Your guide to buying mountain bike lights
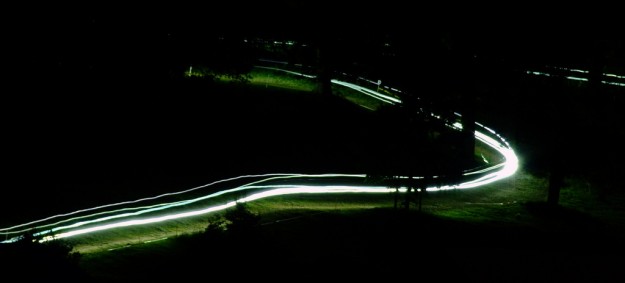
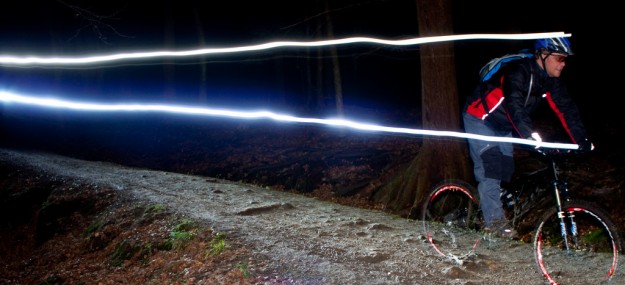
With the winter just around the corner and the evenings drawing in, there’s a lot less daylight available to squeeze in a mountain bike ride. That’s where lights come in, opening up one of the most exciting aspects of the sport: night riding.
The latest trail lights are smaller, brighter and longer lasting than anything we imagined years ago when we thought a 10-watt light was the pinnacle.
Battery and bulbs have come a long way, with the most expensive lights a rival for modern car headlights. While it’s easy to spend a small fortune on a set of lights, the affordable end of the spectrum now offers mountain bikers a lot of choice.
Budget
You can get a lighting system bright enough to use off-road from about £100 up to about £900. As the price goes up, usually so does the amount of light, the run-time and the sophistication of the features available from the on-board electronics.
Brightness
This is what really matters with a set of mountain bike lights: how much illumination they provide. As a rough rule, 150-200 Lumens is enough for a helmet mounted light while anything over 300 will let you keep a decent pace on trails you know.
Keeping spending and you literally turn night into day, its not uncommon to find lights producing in excess of a 1000 Lumens.
Don’t take manufacturer claims too literally. One maker’s 800 Lumen light might not be noticeably brighter than another’s 700 Lumen unit. Not everyone measures output in the same way, and some companies just take as gospel the word of their lamp supplier.
Lamp types
You once had to choose between inexpensive halogen bulbs, seriously spendy high intensity discharge (HID) lamps and early LED (light-emitting diode) systems. LED technology has advanced to the point where manufacturers can choose a vast range of emitters and fulfil just about every need with them, so it’s rare to find anything but LEDs.
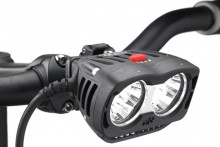
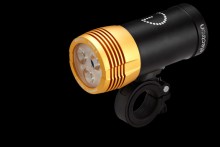
Entry-level lights make do with one LED while more expensive and brighter options will use several, giving a better and more useful spread of light across the trail.
Batteries
Batteries have improved dramatically too. They almost all use lithium-ion chemistry these days, which crams more stored electricity into a given weight and size than the old lead-acid or nickel-cadmium batteries. Lithium-ion batteries also allow manufacturers to pack the lamp and batteries into one unit, so you don’t have a separate battery and cables running over your bike.
Most of the brightest lights still use a separate battery however, which might be encased in a fabric pouch or plastic housing and Velcro-ed to the top tube or similarly convenient place.
Charging
With Li-Ion batteries charging is a fairly straight-forward process, and many lights come with ‘smart chargers’ so you don’t have to watch the clock – just leave it on charge through the night and the charger will take care of everything. Some use USB cables which are handy for charging your lights from your computer or at work.
Mounting
Easy to overlook but the bracket can really make or break a lightset. You’re looking for a bracket that’s easy to use, preferably doesn’t need any tools to use (handy for swapping quickly between bikes) and most importantly holds the light securely in place – the last thing you want is the light wobbling all over the place when you’re dropping into a tight techy descent. A good, solid attachment to the bars is essential. Hinged cam-locking clamps are common and effective.
The alternative to bar mounts is a helmet mount. If you ride tight, twisty trails you’ll probably find that a bar-mounted light is rarely pointing in the direction that you want to go, but a helmet light lets you look round corners.
There are disadvantages. The extra weight on your head can make your helmet wobble about and having a light close to your eyeline makes all the shadows disappear and makes the trail look completely smooth. On some trails you’ll struggle without one, though, and if you have to do any repairs on the trail, they are just about essential. Many riders pair a handlebar light with a less-powerful helmet lamp for the best of all worlds.
Check what fittings you get with the system. Some include bar helmet and bear head mountings, some have just one, with the others as optional extras.
Housings
With twin-beam setups you often want the two beams to be pointing in different directions, so having them in separate or individually-adjustable modules is a bonus. Some systems have both lamps fixed together. The manufacturer has usually allowed for the different beam patterns but you’re stuck with whatever they think is best.
Robust and waterproof housings are essential, as are connectors that keep out the wet. Poor connectors can lead to the light cutting out at the most inconvenient possible time.
Controls
LEDs now offer so much light that manufacturers give you the option of turning them down to increase run time. If you’re riding across open moors with a full moon, you don’t need as much light as bombing downhill in the woods. A sequence of short key-presses usually cycles through the modes.
The simplest setup for a twin-beam system is a switch on each light. Some systems have remote bar-mounted switches that live near the grip so you don’t have to move your hand. These are useful if you switch lights a lot, although some rely on one button to cycle through settings (one lamp, the other lamp, both, off…) and it’s quite easy to get lost.
The most sophisticated lights are programmable, either offering some adjustment of the light level through a built-in system or with a computer interface.
However your light switches between power settings, two features that are a bad idea for off-road riding are a flash mode and an off mode as part of the normal switch cycle. You don’t want to be plunged into darkness between low and high power and you don’t want to be dazzled by the back-scatter from a strobe. Most manufacturers have thought about this and make you do something different, like a long press or a double click, to switch into a non-standard mode.
Run times
Like light output, claimed run times should be treated with a bit of scepticism. They represent the best possible case: a brand-new, fully-charged battery, driving an emitter that’s spot on spec. Real life’s not like hat, so assume you’ll get a bit less and don’t push your luck on the first few rides.
Run time of lithium-ion-powered lights will decrease with age as the battery deteriorates. In theory, this deterioration can be slowed down by storing the battery at a low temperature, so if you put your lights away for the summer, store them in the fridge.
Dynamo lights
Remember the dynamo on your grandad’s bike that ran off the tyre and put out a sputtering and unreliable beam that died completely when the wires got damaged? These aren’t like that at all.
The combination of very efficient LEDs and high-strength NIB magnets means it’s now possible to build a dynamo system that puts out 800 lumens or thereabouts. That’s plenty for many applications, especially if swapping out or recharging batteries is hard or impossible.
Lights, the law and road manners
High-power off-road lights put out far more light than is allowed by the regulations that govern bike lights, so in theory you shouldn’t use them on the road lest you fall foul of PC Plod. In practice, the police have better things to do, but it’s still courteous to use a lower-power setting and point your lights down to avoid dazzling other road users.